Nashik district is geographically located on foothills of the Western Ghats mountains on the banks of the river Godavari, Maharashtra. It may surprise you that Nashik has been designated as “The Wine Capital of India” due to the numerous wineries located within the district. As of 2013, the Nashik region reportedly produces 10,000 tons of grapes per year.
We had taken up a project of Interior Designing here in Nashik for a Bungalow. Following is the stepwise process to 3D design project.
This is in conversation with our Interior Designer, Mr. Jatin Rathod –
Project Area/ Place – Nashik, Maharashtra
First Visit on site
On our first visit, the bungalow was under construction. The client has appointed an architect for main structural work and basic civil work too. To our knowledge, the plan was ready and on papers with the architect and client too. This was the main structural plan created on computer using AUTOCAD program. As you can see in the video, when we visited the site, brick work for internal walls was going on.
Here I would like to share that usually home owners who have bungalows, they are more keen to know how it will appear from outside constructed. I mean is that their main focus and concern is more on structural appearance than interior plan and design for every room space, ambience, its functionality, etc. These home owners habitually end up spending more on exterior look and feel than interior. Also when it comes to interior work and designing, they seem to be quite stubborn with their budget and requirements too.
Usually, during our first visit, we note down clients’ requirement, site measurements of each room and other details like clients liking, etc.
Project Aim
Design interior as well as exterior of the bungalow. The client was quite obstinate to have as minimum design element, furniture, etc. as possible,especially for interior of the bungalow.
We usually come across similar home owners/clients who are so clear for what they want. There were many home owners who believed that more the interior work and design elements for home better and modernize it will appear. It’s a rare case where home owners truly understand that the house will appear elegant and beautiful with just required design elements. Also with minimum work and detailing the house will appear spacious and beautiful.
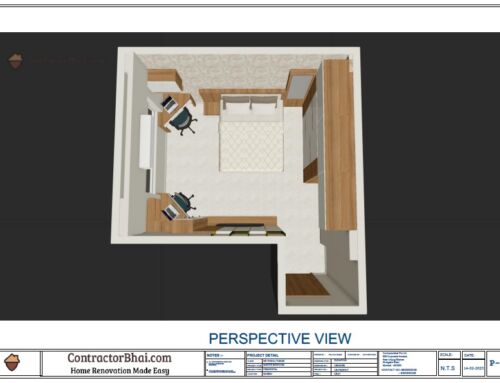
3D-Rough Sketches
Once we have all the required details, rough sketches for interior plan is worked on. This plan is a 3D rough sketch where client gets a rough idea for how his interiors will be. They can view basic details like furniture placement, basic design elements, etc. Client also knows here if his requirements and likings as taken care of or not.
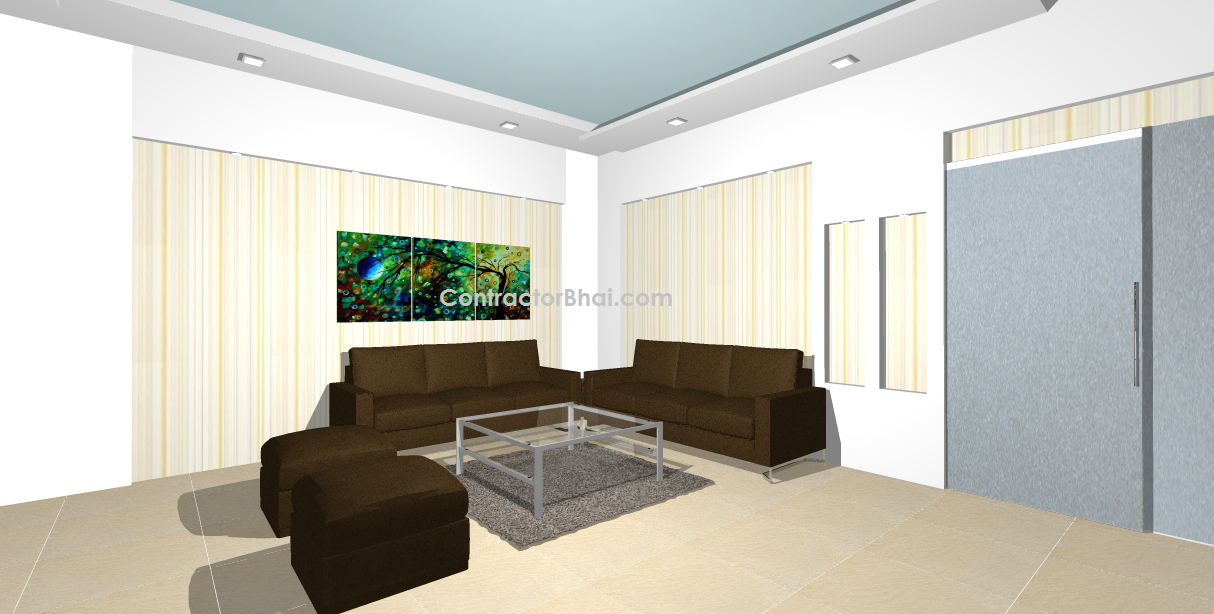
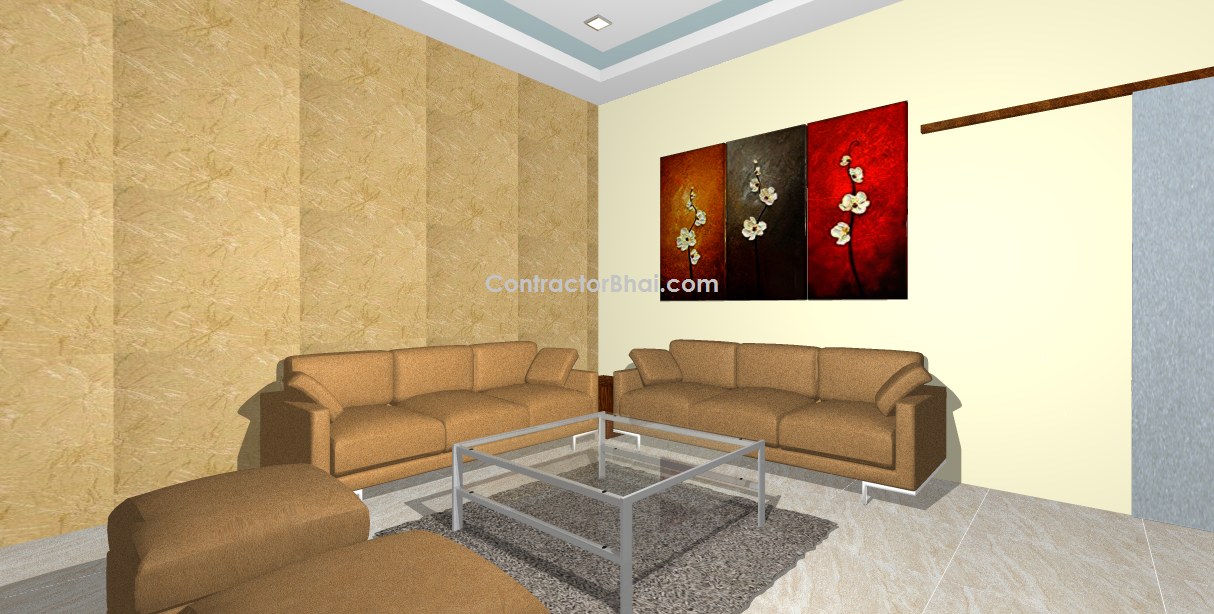
Until now, all the discussion’s and interior plan were discussed verbally. This made difficult for a home owner to visualize how his apartment will look after all interior work is done. With 3D design service today, clients can actually visualize how their apartments will turn out to be after doing all required interior work is completed. The major advantage of rough sketch here is that all the ideas are on papers that are much refined. As you can see in video, it’s a 3D design plan for living room.
Client’s Feedback post rough sketches
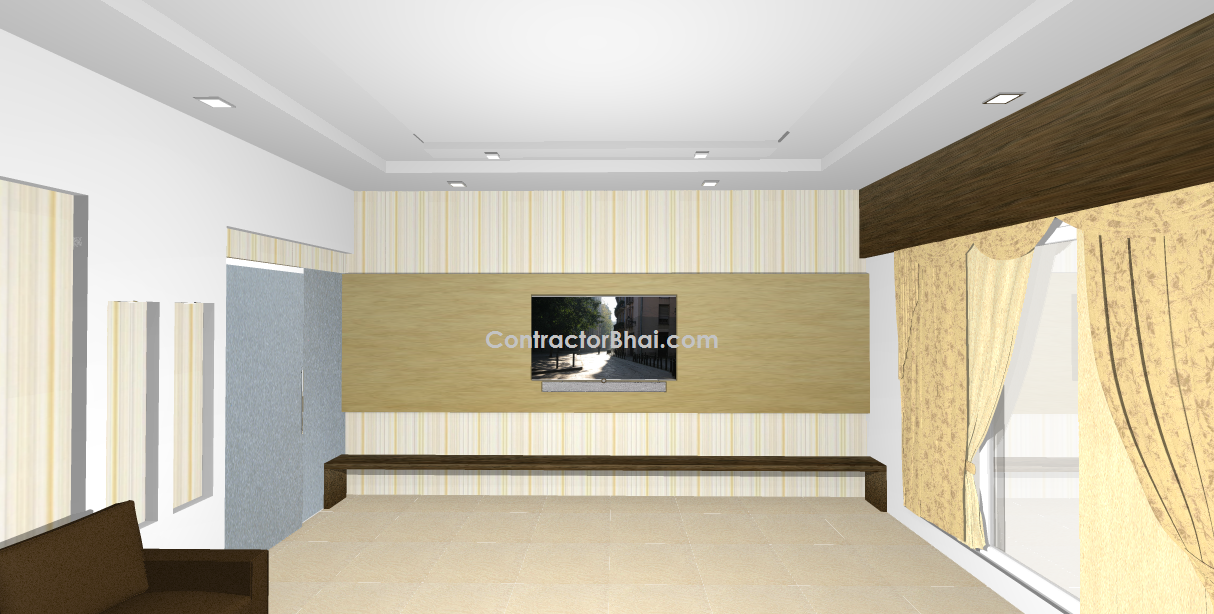
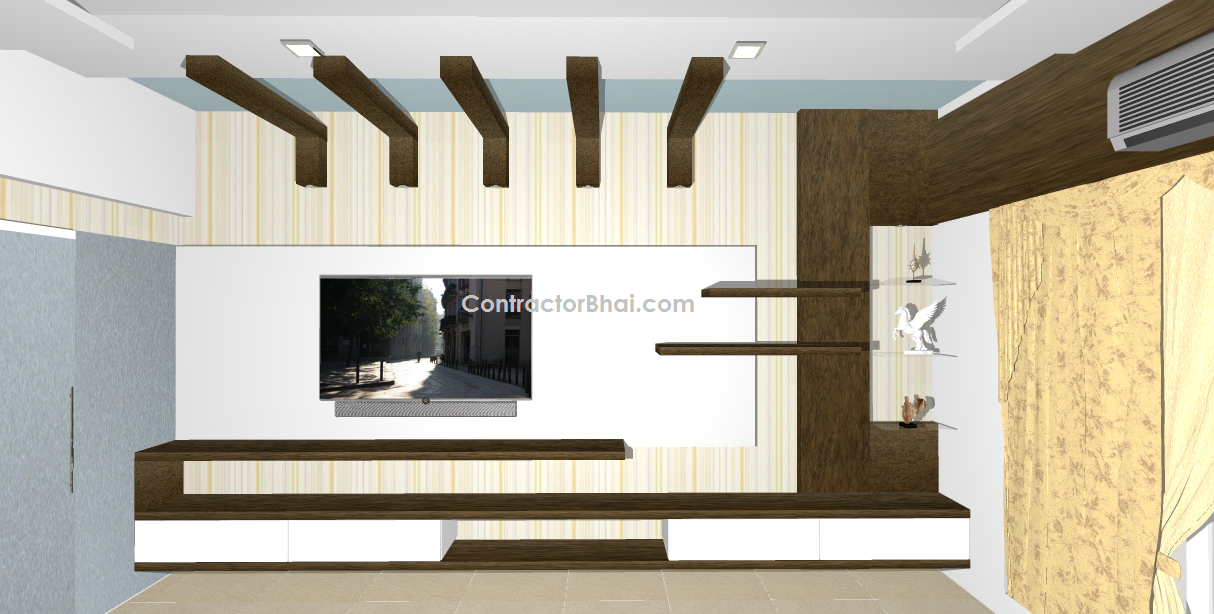
The client wanted us to have minimum design elements and cut down on furniture even more. For living room especially they wanted a very light looking (not heavy TV unit with cabinets and drawers)yet chic and comfortable T.V unit.
Here feedback from the client helps us understand their taste and style for home interiors and make necessary changes even before the actual work has started. We therefore made changes in TV unit design to chic looking one.As you can see in the video for revised plan, all the designer elements were moved out and we gave a very simple, neat looking designfor TV unit. We gave a very simple paneling to the TV wall with LED lights above and below the panel. There were no cabinets or drawers provided, since the client was reluctant to have one.
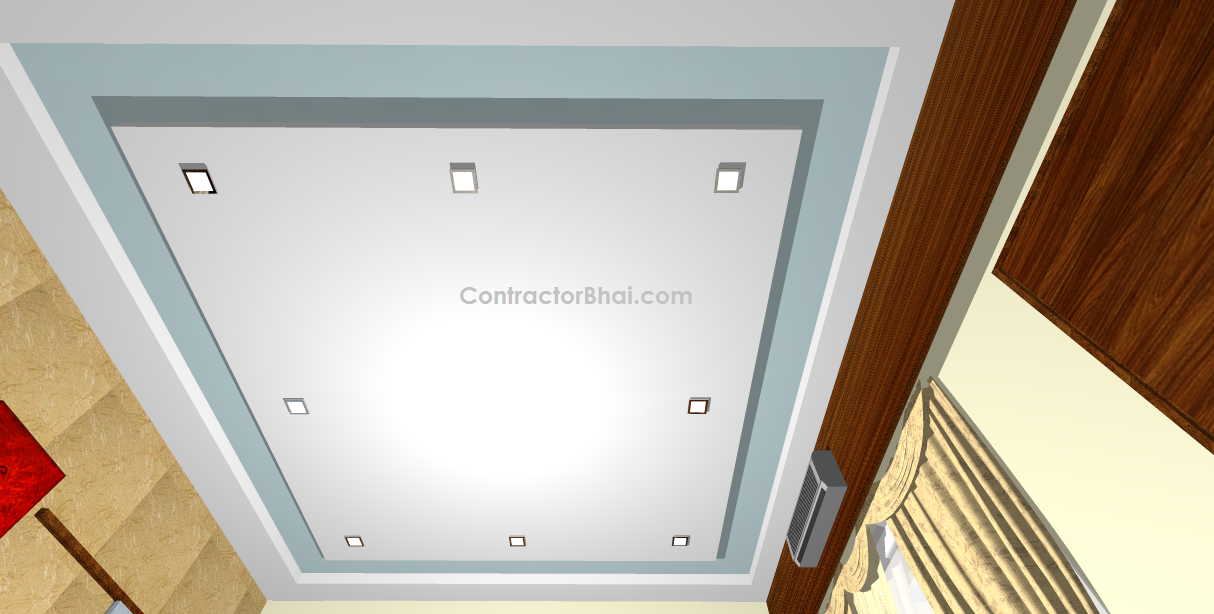
For false ceiling to that was initially a designer one was now changed to simple false ceiling design with minimum number of lights.
Well every home owner has different taste and style. Here the client was keen on having minimum elements yet have elegant interiors.

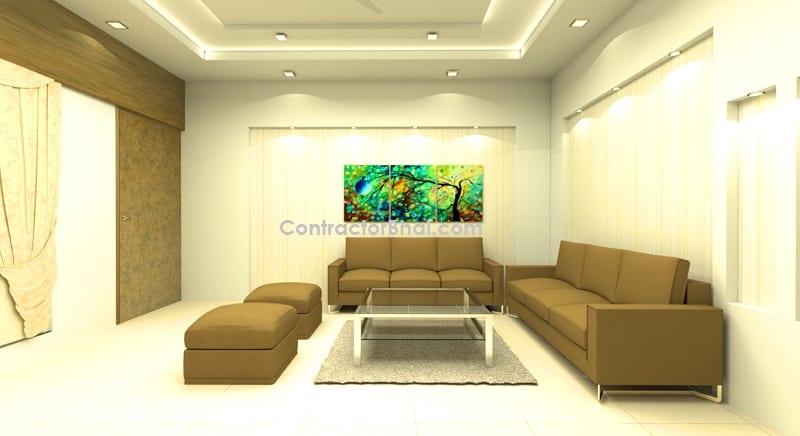
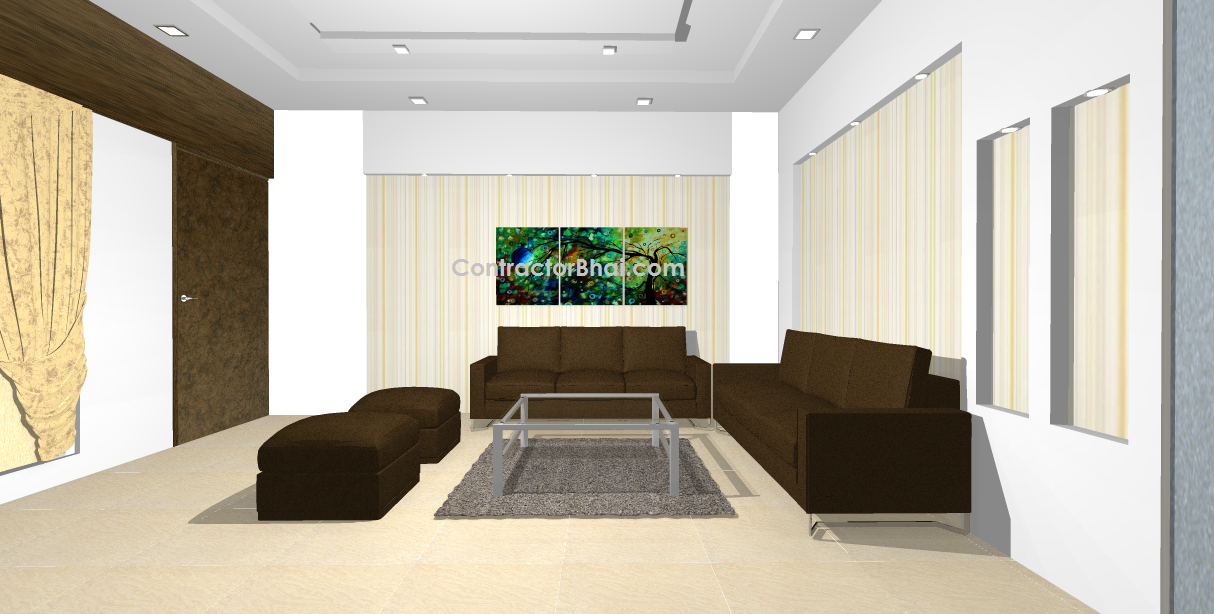
3D photo realistic sketch – Once the rough sketches are approved and finalized, we work on 3D photo realistic sketches. Well, when you are spending lakhs of rupees for your interiors, I am sure everyone is keen to know how their home will turn out to be post work. Initially home owners could only imagine for how their interiors will appear through discussions. They could see the interior work only after it’s complete of probably while in progress. But, today with 3D photo realistic sketches, our clients can view how their interiors will change with smallest of the design element, that to even before the actual work has started.
With 3D photo realistic sketches home owners can view their interiors with the chosen material for a product or feature like,
• The actual color and shade of wall paint. If the color is glossyit will glow and if matt, how will it look.
• The laminate color and style
• Tile used for flooring
• Furniture color, style and placement
• The placement of glass and its appearance and how it will influence the room interior
• Type of False ceiling and its shape and its impact in the room.
• Type of light and light fixtures used to enhance and create and ambience for house interiors.
As you see in video, these are 3D photo realistic sketch of client’s living room. Client can actually view the wall color and it effect, false ceiling, tile, laminate style, curtain color and design, paneling,etc. for each rooms. They can view the arrangement and effect of lights fitted on false ceiling and how it can change the ambiance of the house.
3D photo realistic sketches help home owners yet make any changes if required before staring the actual interior work.
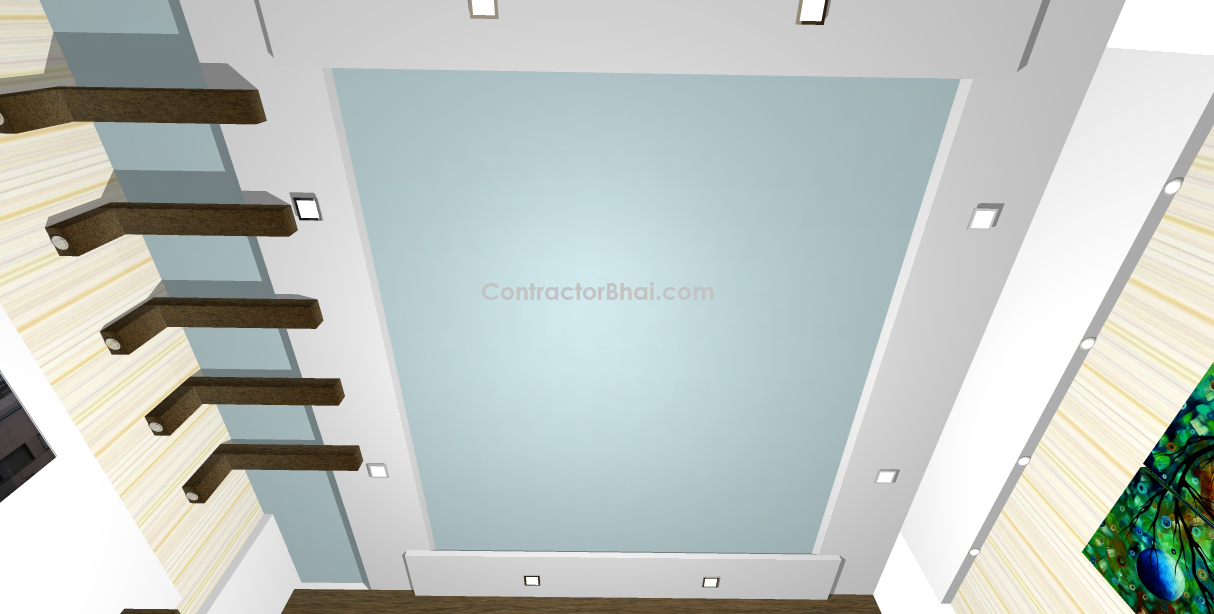
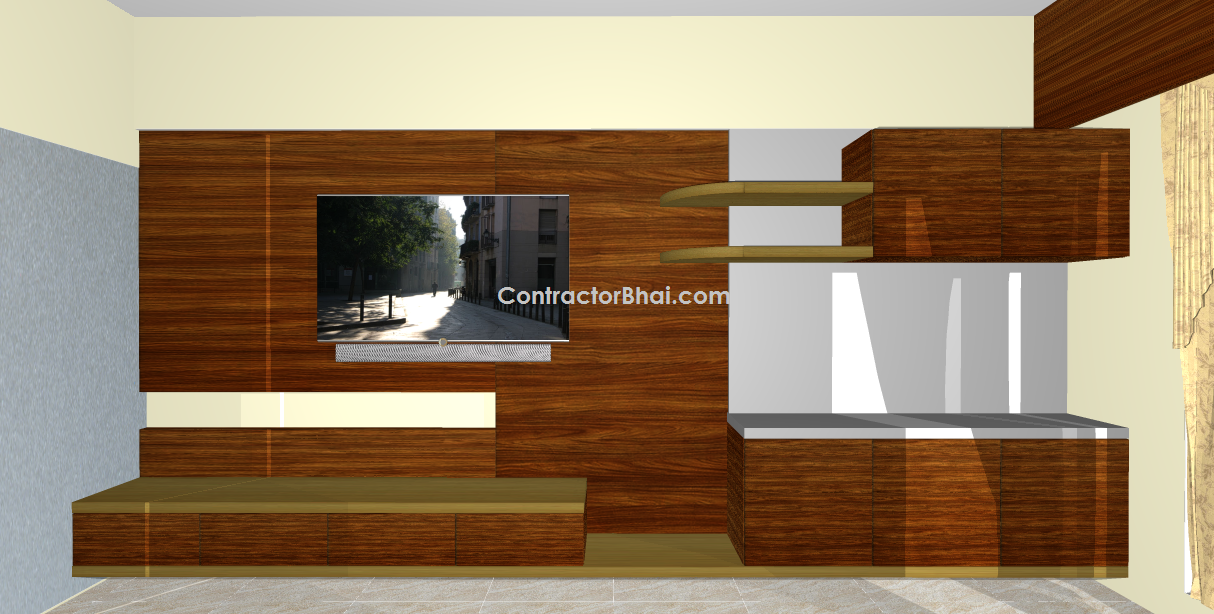
2D Elevation Drawings
In addition to 3D sketches, we provided client with 2D elevation drawings of each wall or segment of the house you can say.Elevation meaning the front view of the given wall. In 2D elevation drawings, the client gets to see each and every object be it the smallest one of each wall. You can see the TV wall elevation in the video, followed by wall where seating arrangement is placed and other walls too.
How 2D drawings help Contractors
These 2D drawings are shared with respective contractors too. 2D drawing help them work faster and better since it has all the details like detailed size (height width and depth), what is to be placed where and how far and above from floor level, what material is to be used, etc. It helps them view how the final product shall look like, so they can work accordingly.
The 2D drawing are shared with contractor too for their reference. These 2D drawing help them work faster and better since it has all the details like detailed size (height width and depth), what is to be placed where and how far and above from floor level, what material is to be used, etc. All the details required to work for a contractor or even a carpenter, everything is mentioned. Since all the details are given to him, a contractor is able to work faster and also able to focus on quality too.
Let’s say for False ceiling here, the contractor will receive a 2D drawing where in all the details like number of lights, the distance between each of them, levels of false ceiling, its depth all such minute details are mentioned. Here what happens is the calculation part and main thinking process that was required is already done which saves on contractor’s work time. This in turn helps him work faster and better.
You can therefore see that 3D design service provided by Contractorbhai.com not only helps home owner view his house before work is done but alsosaves on time, money and headache behind mistakes and misunderstandings too.

Leave A Comment