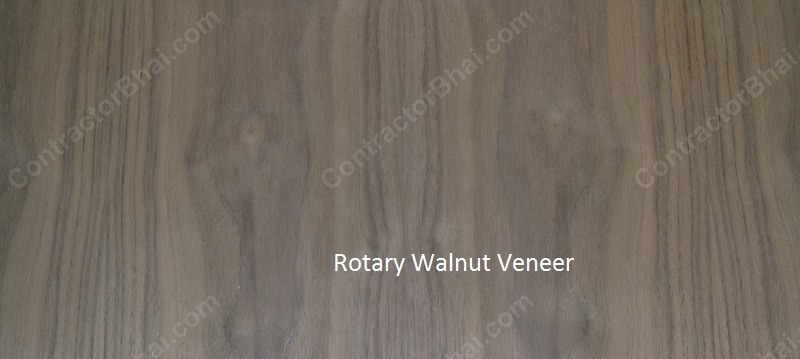
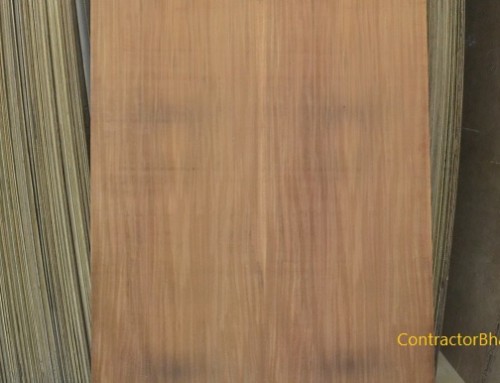
Veneer can easily be applied to substrate i.e. plywood or MDF in 5 simple steps.
i. Once the veneer is selected of, carpenters cut veneers and substrate (plywood or MDF) in appropriate sizes.
ii. After cutting, glue is applied to both the sheets- veneer sheet and the substrate. Few pointers to remember while gluing is to use right kind of glue. Contact cement glue is best for paper backed veneers. And standard cold press or Better Bond veneer glue is perfect for veneering as it dries faster and creates a strong bonding.
iii. The glue used is allowed to be half dry on each sheets. Then the veneer sheet is carefully positioned on the substrate.
iv. Once the veneer is laid on substrate, press down the veneer with maximum pressure for stronger bonding. This can be done with suitable tool like smoothing blade. For bigger plywood sheet (especially at industrial level), vacuum press tool is used for clamping veneer to substrate. This tool applies pressure evenly across the surface which is the most important thing. For smaller pieces, one can also use clamps and weights to get good finishes veneer panel. If the pressure is not applied evenly, bubbles may form which will ruin the panel.
v. Now turn over the piece upside down and chop the excess veneer (if any) with a sharp blade. The same can be done to the substrate if needed.

Pressing down the glued Veneer to substrate with smoothening blade
Many carpenters use nailing technique. Here carpenters directly nail the veneer sheet to the substrate rather than go through gluing process. But let me tell you that this is not a right technique. It damages the veneer. Carpenters often opt for nailing technique assuming it as a short-cut method. But the truth is that it increases labor by 30%- 40%, which is still fine as compared to the damage it makes. Nailed veneer piece furniture would look untidy with unfinished edges and cracks me be seen due to nailing. Knowing it is not a right technique, many carpenters still go for nailing veneer.
Home owners need not worry for known and good carpenters as they will always opt for gluing process be it veneer or artificial laminates to substrate. Veneered glued furniture turn out to be well finished furniture that appear a clean piece of art. So do have a look for what technique is your carpenter using- nailing technique of the gluing process.
Polishing Veneered sheets or furniture
Once plywood is veneered, the veneered wood sheets are sent for polishing. You also have unpolished veneer sheets available that are polished by carpenters once the furniture is ready. No matter what polishing is a compulsory step after veneering. There are different types of polishes used to derive desired effect.
The basic and much preferred polish given to veneered wood is Melamine polish. This polish gives a matt finish look i.e. it doesn’t shine like a glossy surface. Glossy polish is not preferred by Home owners as it takes away from its natural look and charm. Melamine polish Veneer cost around 100/- to 150/- per ltr.
Easy steps to polishing Veneer
i. The veneered plywood sheet or furniture is smoothed with sand paper which also remove dirt settled on top. The sand paper is gently rubbed in direction of grain.
ii. Many carpenters use wood conditioner on veneered wood that absorbs stains evenly from veneer. This piece of wood is left for drying for a while
iii. Later wood stain wax is applied which absorbs stains further and give a natural wood look. If lest for longer time, the veneer shade may get darker, so the veneer is wiped off with a cloth/mop to remove the excess stain and solution.
iv. Finally the polish solution is applied to the veneer with spray machine at industrial level.
v. The polish step is repeated several times to get the desired shade and effect.
The same procedure can be repeated at home level using a brush and small cloth. The number of times polishing steps are repeated, the veneer will appear to be darker and glossier. You also have laminated veneer which are quite an expensive piece and is time consuming. These laminated veneered wood appear like glass placed on veneer. Depending on requirement, the veneer is laminated through repeated process of polishing. To your surprise sometimes there are 6 to 7 layers of laminates placed on veneer to acquire the best of looking veneered wood. But every time the chemical is sprayed, it is rubbed to remove dust or excess stains. For melamine polish, the spraying and scrapping process is done only once and that’s why it is available for cheaper price.

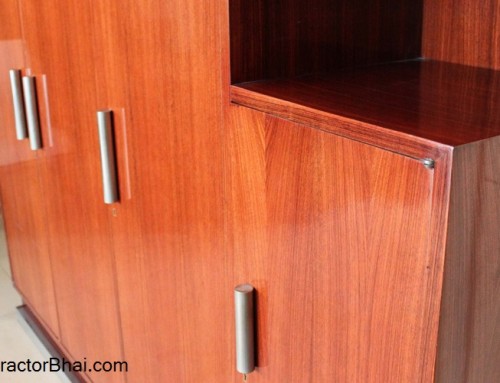
Glossy Polished Smoked-veneer
Another polish that is not spoken is about is PU i.e. polyurethane polish. PU polish is rated somewhere between melamine and ruby finish polish based of its quality. The main difference is that buffing is not done to veneered wood if PU polish is to be applied unlike melamine. PU polish is directly applied/sprayed to the veneer that gives a glossy effect. PU polish is commonly available in glossy and not matt as matt effect is mistaken with melamine by most people. Melamine as I said earlier is available for cheaper rate whereas due to its chemical properties, PU polish is comparatively expensive which inturn makes the polished veneer wood an expensive piece. Therefore while buying, Home owners obviously choose for cheaper price polished veneered wood not knowing about different polished and its features.
While buying Laminates Home owners may come across the term “Microns”. Microns mean the strength of the laminates or veneer. Usually laminates micro range from 2,000-3,000 while for melamine it ranges from 600-1,000. The latest mono-coat veneers are available at 10 micro.


HELLO,
nitinbhai, which number sandpaper is used for
“the veneered plywood sheet or furniture is smoothed with sand paper which also remove dirt settled on top. The sand paper is gently rubbed in direction of grain”
Thanks
Regards
Shekhar
Hi Nitinbhai
Thank you for the nice infirmative article on Vaneer polishing, could you pls also mention roughly vaneer polishing charges for better clarification
Regd
Please refer cost of veneer polishing
Is it possible to fume veneer at home? If yes then what are the steps and tips to be considered. Thanks Mrs Amre
Mrs Amre, it is best to hire experienced person to do this maintenance work. Polish related materials need to be handled carefully.
Can you please tell me how to lighten my veneer… As the workers have applied some polish ( light red in colour + some Chand paasha they have mixed) because of which it has become dark… N the final spray of melamine is still not done. I enquired with one more person he told me to use thinner on that and do scraping and after that mix grains In spirit n apply it on veneer. And at the end melamine polish to be done. Please help me with this..??? And also suggest me does melamine polish comes in different colours?? Plz suggest me ways o lighten my veneer
I have bought white veneer. After polishing with PU, it is turning cream. I want to use lamination for some sheets. THe polish person applied sealant and it is turning between cream and yellow. He is sayin white veneer will never remain white. Can u pls confirm this?
Hello mam, you should go for a clear coat
Bhai which polish is durable on veneer compare to melamine & rubio cote
Or Elsa you suggest any other
Please tell me the rate of per sq ft of veneer with pu polish …
How to clean a sun-burned white dirty veneer before polishing. Thanks. L. Kharlukhi. Shillong, india
Need polish in kharghar
Really your provided information is good and help full….
Can Duco paint be applied over Veeneer?
Does the melamine polish spray process on veneer affect to breath surrounding while doing it at home?
I would be grateful if you could please let me know the process of applying wood veneer over parts of my PoP false ceiling to enhance the beauty of the ceiling?
My contractor is quoting about 9Laks approx for polishing including labor and material.
There are 108 veneer sheets divided into 4 different shades.
I am told he would be using PU polish
Is it the right price ?
Hello Sir,
We have wooden furniture at home and we have used imported Veneer long back which is polished using PU technology. Currently from last few years we see white patches and marks all over the veneer during Rainy and Winter season … can you please help how to remove them sir
My caprnter has nailed the veneer onto the plywood. I realize this was a mistake as there are nail holes all around the veneer.
Is there a way to cover up these nail holes during polish. Let’s see we use PU a polish
Can you suggest a good way to cover up these nail holes
it is common practice. Nails are used. They will be filled before polish of veneer is done. Talk to your carpenter
What is the life of veneer furniture ? Do we need to change veneer after 15 years of use or can we go with veneer polish.?
It will simply last.. doesnt get damaged except for physical damage. Re-Polishing can be done in some of the types. Veneer is natural product except some of the types of polish(like mirror / glossy ones) rest all stay natural & even if they slightly change colour it stays natural. And that is the idea behind using Veneer. You want natural wooden surface. not artificial one..
Mine is metal finish veneer ..seller has told not to do sand running on it .. but nailing has been done by carpenters so polish person says we will need to do putty .. can u suggest what to do.
that is common practice.. they fill in putty.. commonly done, nothing to worry..
Vineer polish on some of our TV unit panels have spoiled due to water. What polish at home can be done to avoid further problems?